
Outdoor Kitchen Layouts: Linear, L-Shape, U-Shape, Island
Indoors, a bad kitchen layout is an annoyance. Outdoors, it's worse — because there's no wall to hide the mistakes, guests stand exactly where you need to work, and a grill in the wrong spot smokes out the dining table every single evening. The good news: outdoor kitchens use the same four basic shapes as indoor ones, and after three decades of designing both, I can tell you exactly when each shape earns its place.
Before we get to shapes, one rule that governs all of them: an outdoor kitchen is designed around the grill and the smoke, not around symmetry. Establish prevailing wind, decide where people will sit, and put the fire where its smoke leaves the party. Every layout below assumes you've done that first.
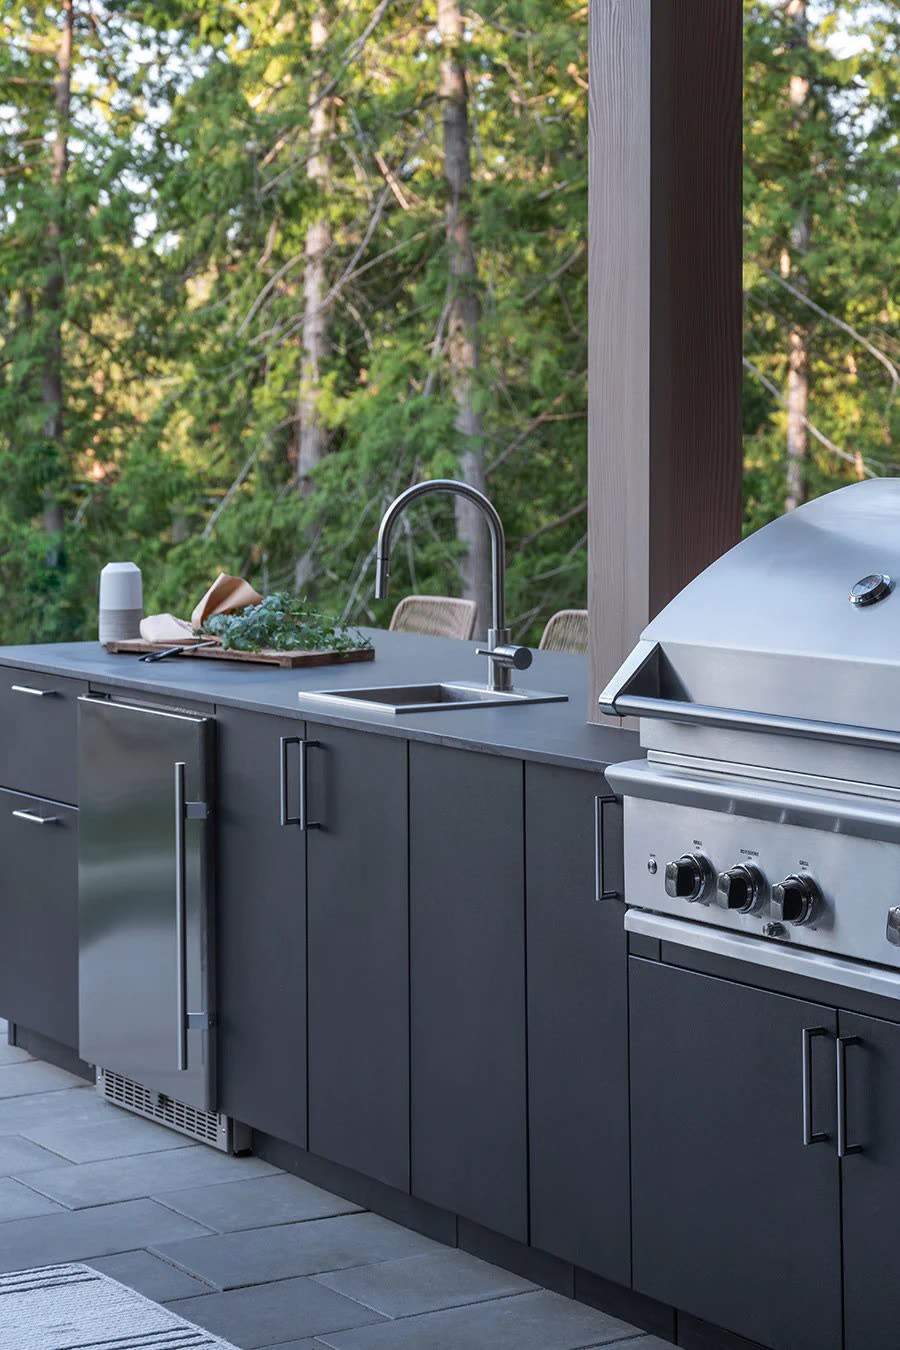
The linear run: the honest workhorse
One straight run against a wall or railing, typically 10 to 16 feet. This is the right answer for most patios, and I say that as someone who profits more from bigger shapes. A linear kitchen keeps utilities in one trench, keeps costs down, and — critically — keeps the cook facing the party instead of a wall, if you place it right.
The working math: a 36–42 inch grill needs a minimum 12-inch landing zone on one side and 18–24 inches on the other. Add a 24-inch fridge cabinet, a double-door storage cabinet, and a trash pull-out and you've consumed about 10 feet before anyone's asked for a sink. That's why I tell clients a linear kitchen under 8 feet is a grill cart with ambitions — real storage and prep space start around 10 feet.
Watch out for: the "everything in a row" trap. If the fridge is 14 feet from the grill, the cook does a cha-cha all night. Cluster the grill, prep landing, and refrigeration within a 6-foot working core, and push storage to the ends.
The L-shape: separation of church and grill
An L adds a return leg — usually 6 to 8 feet — at ninety degrees, and it earns its cost the moment you cook for more than four people. The long leg holds fire: grill, side burner, landing counters. The short leg holds everything cold and social: sink, fridge, bar counter. The corner naturally divides the hot zone from the zone where a guest can refill a drink without walking through your tongs.
Minimum footprint is roughly 10 × 8 feet of run along the two walls of the L, with 42–48 inches of clear floor inside the angle — enough for two people to pass without choreography. The corner cabinet itself is the classic dead spot; we treat it exactly like an indoor corner, with a LeMans pull-out or angled door rather than a black hole. (Corner hardware is one of the places we specify the same Blum and Hettich mechanisms we use indoors, in stainless-rated versions.)
Watch out for: putting the grill in the corner itself. It looks tidy on a plan and cooks terribly — no landing zones on either side, and the hood traps heat against two walls.
The U-shape: a working galley for serious cooks
Three connected runs forming a U give you the most counter and storage per square foot of any layout — a genuine outdoor workroom. It suits households where cooking outside is a several-nights-a-week habit, not a Sunday event, and it's the natural shape when the kitchen lives inside a covered lanai or pergola structure where three sides already exist.
Dimensions matter more here than anywhere: the clear width between opposing runs must be 48 inches minimum, 54–60 if two people cook together. Tighter than that and open appliance doors collide; wider than 72 and you lose the galley efficiency that justified the shape. A U under 12 feet across the back wall usually feels cramped once appliances are set.
Watch out for: ventilation. A U concentrates heat and smoke in a pocket, so under any roof it needs a proper vent hood, and even open-air U-kitchens want the grill on the leg facing downwind. Utilities also triple — three runs mean more gas, water, and electrical planning, which is exactly why we rough-in from approved drawings, as covered in our utilities planning guide.
The island: theater in the round
A freestanding island — often with bar seating on one or two sides — is the entertainer's layout. The cook faces guests, the seating rail keeps drinks and elbows out of the work zone, and the shape anchors an open patio the way a fire pit anchors a lawn. Islands pair beautifully with a second, smaller run against the house that carries the sink and fridge, splitting fire from water exactly like an indoor island kitchen.
The numbers: a working island wants to be at least 4 × 8 feet. Bar seating needs a 12-inch overhang minimum (16 is comfortable), 24 inches of width per stool, and — non-negotiable — the seating must not face the grill at spatter distance; keep 24–36 inches between the cooking zone and the nearest guest, or put seating on the return. Walkways around a freestanding island should be 42 inches clear, 48 on the service side.
Watch out for: the smoke halo. An island in the middle of a patio has no wall to carry smoke away, so wind direction decides everything. And utilities must arrive under the slab — plan the island position before the patio is poured, not after.
Choosing between them: the questions that decide it
- How many feet of counter run does your space honestly allow? Under 10: linear. 10–18 with a corner: L. A covered three-sided space: U. Open patio with room on all sides: island.
- Who's outside while you cook? If the answer is "everyone," prioritize layouts where the cook faces the seating — island first, then L.
- Where does smoke go? The layout that puts the grill downwind of the dining table beats a prettier one that doesn't.
- What's the budget doing? Each added leg adds cabinetry, counter, and utility runs. Our cost breakdown shows where the money actually goes; shape is a bigger lever than appliance brand.
- What's it built from? Whatever the shape, coastal and rooftop sites push toward welded marine aluminum — the comparison is in our materials matchup.
A note on growing into a layout
One advantage of welded modular-bay construction that clients rarely consider at the start: layouts can be planned in phases. We regularly design the full U or island scheme on paper, then build the linear core — grill, fridge, storage — in year one, with utility stubs capped and waiting where the future legs will land. Two years later the return leg arrives, bolts to the existing run, and the kitchen looks like it was always whole, because on paper it always was. What makes phasing fail is the opposite order: buying a small kitchen with no master plan, then discovering the gas line, slab, and roof posts are all exactly where the extension needs to be. If the budget says start small, spend the design effort on the finished vision anyway — trenches and stub-outs are cheap on day one and brutal on day seven hundred.
Practical takeaways
- Design around smoke and sightlines first; pick the shape second.
- Cluster grill, landing zones, and fridge within a 6-foot core in any layout.
- Clearances that make or break it: 12/18-inch grill landings, 48-inch galley width, 42-inch walkways, 24-inch per bar stool.
- Corners are for storage with proper pull-out hardware — never for the grill.
- Position utilities before hardscape is poured, especially for islands.
Every iKitchen outdoor kitchen is designed to your patio's real dimensions in welded marine-grade aluminum, in any of our layouts and any powder-coat color. Browse our outdoor kitchens, or book a free 30-minute design consultation — bring a rough sketch and measurements, and we'll shape the layout with you on the call.